In
this step you will load the .doc files saved as "Webpage
Filtered"
into the DAISY Production Program.
1.
After all files have been cleaned and saved as "Web
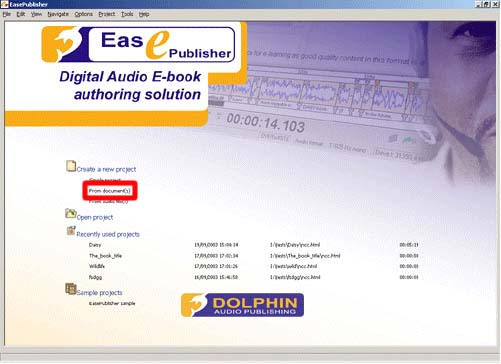
Page, Filtered" in the correct folder, open EasePublisher.
Ensure the
usb hasp key is inserted in the workstations USB port.
2. Use Create a New Project "From
document(s)"
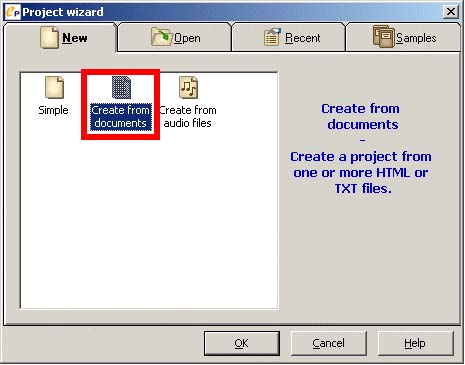
3.
In the Project Wizard - choose "Create From Documents"
4.
In the Create New Project Wizard under Project Title name
the new project “Book_Title_DTB”
[replace "Book_Title" with the
actual title of the book]
5.
To determine the Destination Folder for the finished product
a. Click “Select Folder”
b. Navigate to the folder containing your current project
c. create “New Folder” and title it "Book_Title_DTB"
d. click “OK”
e. then click “Next”
![To determine the Destination Folder for the finished product follow steps [a] thru [e] in part 5](graphics/section3_part3.jpg)
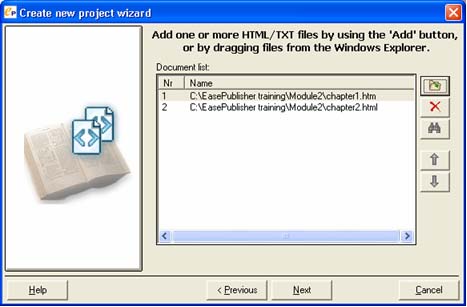
6.
Add all the .txt files for your project into the Create
New Project Wizard.
a. Open all files using the top right button “add
one or more files to list”
b. Click "OK" until you see the file list again.
+ Ensure that are files are listed and in the correct order
- move them up and down if necessary
c. Click "Next"

From this point forward you
will be Marking-Up documents for the final encoding into
DAISY.
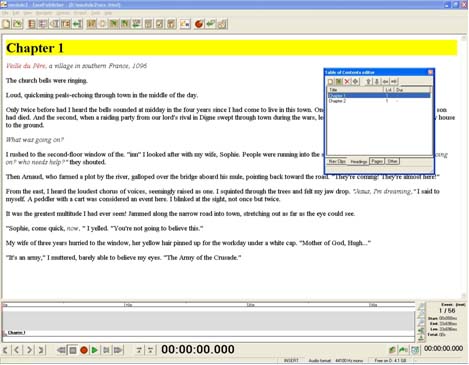
The program
will take you to the next step automatically and should
see before you the Book Text on the left of the screen and
a work box titled “Table of Contents editor”
[F4] on the right. You will be going back and forth between
these two screens.